Faux Grandmother's Flower Garden Block Tutorial
I am all for the easy method of doing some things. English
paper piecing always seemed hard, until I actually made myself sit down
and do it. But I don't think I would enjoy having to wrestle so much
fabric to put all of my flowers together in the traditional way. I hope
you enjoy my take on creating the GFG blocks.
The only tools you will need are 2 coordinating fabrics (one light and
one dark), a hexie template in the size you want to work with, a
cardboard hexie that is about 1/2 inches smaller than the one you will
be cutting by, needle, thread, an iron and an ironing surface.
I bought my hexie template rulers from Quilters Rule
because I loved that they had the view finder and allowed you to trace
the inside of the template to create your cardboard piece to iron by.
Start by placing your hexie template on your fabric and tracing around
the outside edge of the template in 6 different areas on your fabric.
If you have a hexie template with the view window, take advantage of it
to fussy cut your fabric.
If you choose to, you can omit the tracing part and just cut around the hexie shape with your rotary cutter.
Remember to cut 6 hexie shapes!
Turn all 6 hexies over to the backside and lay the hexie template back down on the back. Trace with a marking pen all around the inside edge of the hexie. This line will help you when you start ironing the edges under.
Now, we are going to iron the edges under for all 6 hexies! Lay the
cardboard hexie template down on the backside of the hexie shape. Line
the cardboard hexie up with your traced line. Fold the top edge down
over the cardboard just to the drawn line and iron.
I will move to the bottom edge and iron the edges under there next. This helps keep your cardboard hexie stable.
Then do your sides, one at a time, taking care to have those corners sharp and to the point!
You will have this once you make your way around all 6 sides!
Now carefully remove the cardboard hexie.
Turn your hexie piece back over so the right side is up, and taking your
fingers, work all the pressed edges back under if they are trying to
peek out and press your hexie one more time. Do this for all 6 hexies!
Now you have this! And your pressed hexies are now the size of your cardboard hexie! Just right!
I always make myself a road map whenever I am sewing any quilt! I lay all 6 of the hexies out like I want them before I start sewing them together.
When you are ready to start sewing your hexies together, lift one of
the hexies and turn it back to the left taking care to keep the top
edges together, that go together. Lay the hexie completely down on top
of the other so that right sides are toughing.
Pick these two hexies up and shift them so that both corners match up well along that edge.
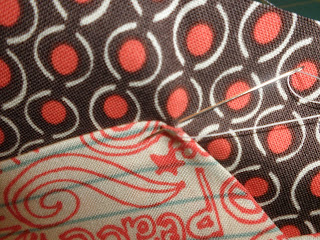
Threaded with a neutral thread, take your needle and bring it up
underneath the flap and bring it out right on the corner of the hexie
closest to you. Stop pulling the thread when your knot is safely tucked
up inside the flap and rest right next to the hexie.
Whip stitch all the way across from one corner to the other using tiny even stitches. It will be as if you are almost satin stitching these 2 hexies together.
Do not take large bites with your needle. You want to insert your
needle as close to the top edges as possible to get that tiny stitch.
Finish off by taking 3 stitches in the last stitch and knot off. Clip
your thread.
Lay out the sewn piece and finger press the seam open.
Making sure your road map does not get out of place, lay this section back down with the others and proceed to pick up the 3rd hexie to be joined to these first two in the same manner. Continue on around until all 6 hexies are sewn together!
Remember... Take tiny bites!!
Now you have all 6 hexies joined together into a pretty flower!
Cut a background block to sew your flower to... Size of background
square will be determined by the size of the hexie template that you
used!
Make sure you have at least 1 1/2 inches of background showing all the way around once your flower is laid down.
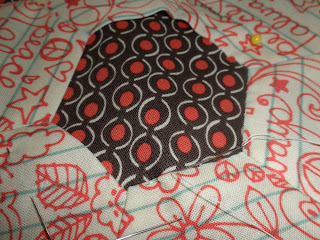
Pin the flower to the background well!
Knot your thread and bring your needle up from the bottom, and taking
that tiny bite again, stitch the flower to the background square!
I took stitches about every 1/16th of an inch so that the edges of the
hexie flower would be good and flat. Remember to take those tiny bites
when coming up through the background and into the flower.
After you go all the way around the outer edge of your flower, you will
stitch in the same manner all the way around the inside of the flower.
That fullness will work itself out as you pull your stitches while you
sew.
Ta-Da!! And you have just made a Faux Center Grandmother's Flower Garden Block!!
FYI: Some people will tell you to do a basting stitch around the hexies
after you iron them to keep the flaps down while you sew the hexies
together but that is a lot of un-necessary work to me. But, if it makes
your life easier to do so... then baste them down..but remove the
basting stitch once you have the flower sewn to the background square.
So, there you have it. Thank you for
watching while I showed you how I go about making these faux center GFG
blocks! I hope I have helped you find an easier way to stitch your own
hexie flowers!
Linking up today with:


Great tutorial. Thank you!
ReplyDeleteWhen I first saw the hexie on your blog, my hexie gaurd went up ! But, I could do this....not that I will....but if I do, it will be done this way....great tut my friend !
ReplyDeleteNice tutorial, Thearica. Thank you.
ReplyDeleteI must admit that if I were ever to do a 'sane' quilt for myself this would probably be the pattern I would choose. Thank you for the tutorial.
ReplyDeleteThank you so much for all your suggestions on this site. Your shares are very interesting and very rewarding. Congratulations to you.
ReplyDeletevoyance gratuite
voyance par mail
ReplyDeleteCool blog you have here, I will check in often.
Voyance gratuite mail
I stumbled upon your blog very interesting! ! Thank you for giving us this moment of pure happiness .
ReplyDeletevoyance gratuite par email
This blog has a lot of friendliness and a warm welcome
ReplyDeletevoyance gratuite par mail
Great stuff from this part of the internet. Again, thank you for this blog.
ReplyDeletevoyance email
Je trouve vos images pleines de douceurs...
ReplyDeleteFélicitations! quel beau travail.
voyance gratuitement par mail
ReplyDeleteJ’ai passé un bon moments et j en ai eue plein les yeux!!!
vrai voyance question gratuite
such an informative work embroidery digitizing services in usa &^%&^%&*
ReplyDelete